


Technical Articles · Replacement Windows
A full-size cardboard template can help communicate a flat replacement window’s outline when an engineering drawing is unavailable. Its value depends on a clear reference, accurate markings and measurements checked against the original. This guide explains how to prepare one and what information must accompany it.
In this guide
Start with the reference you have. If the original panel is confirmed complete and flat, and a template is needed, follow the steps below. If you only have an opening, a damaged or missing panel, a curved window or an uncertain reference, share existing photographs, approximate dimensions and the quantity needed first. Discuss the next useful measurements before making a template.
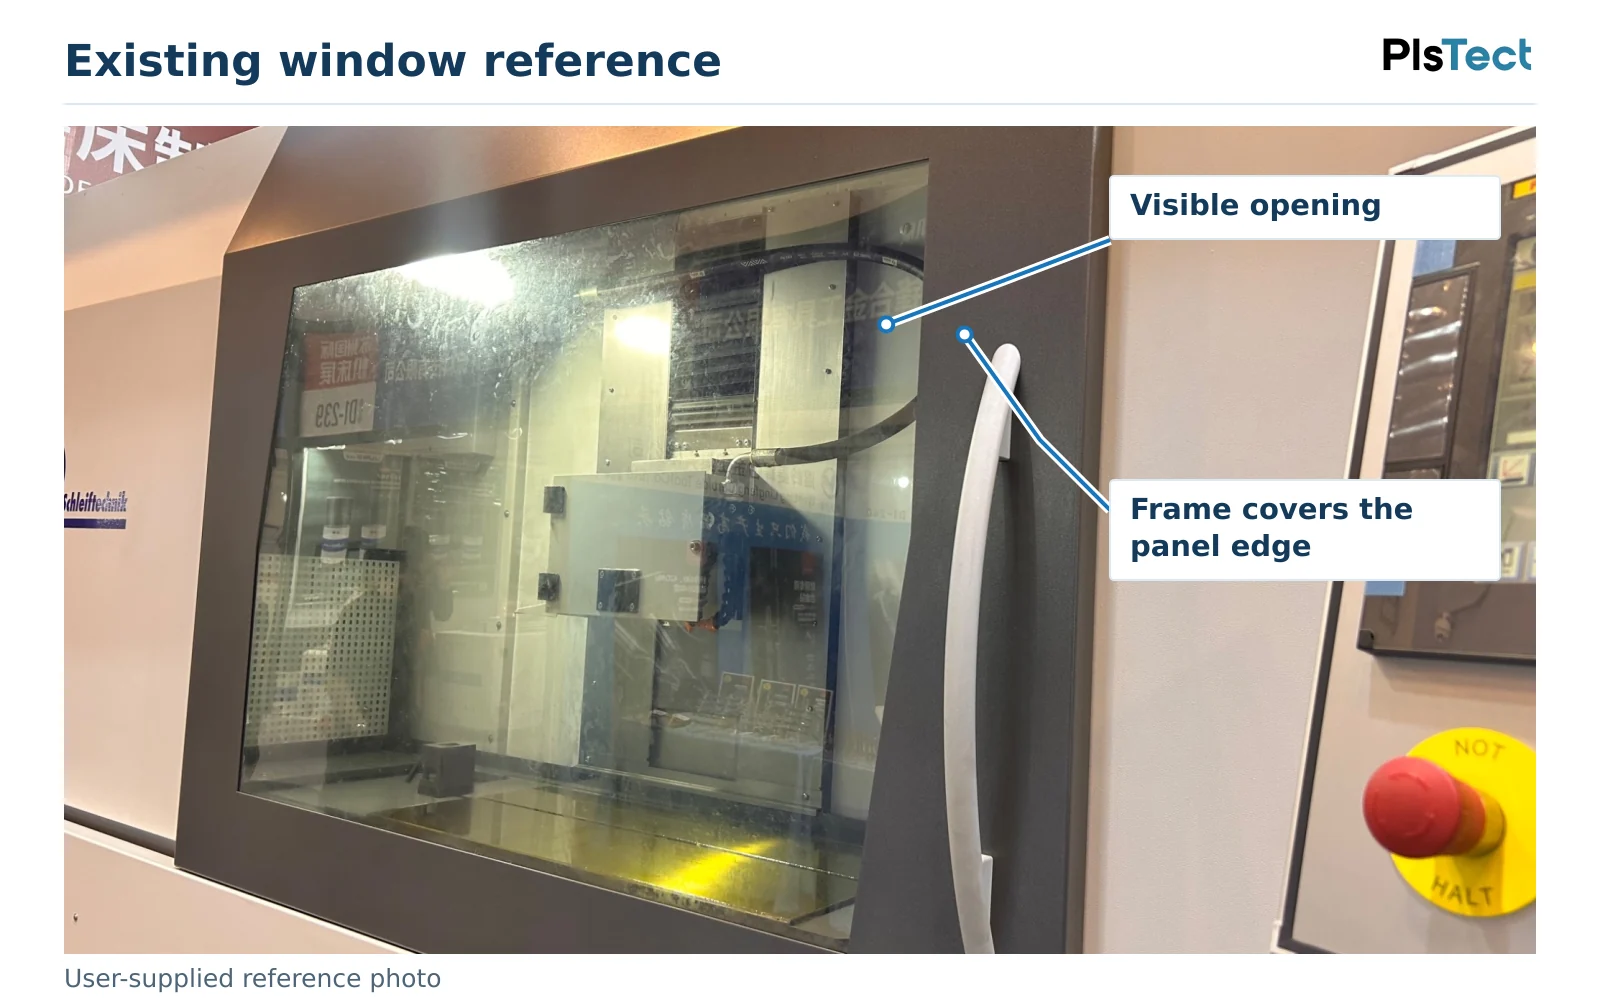
When is a cardboard template useful?
Use a template when you can trace an intact flat panel or another reference agreed for the project. Choose a pattern material that stays flat and preserves the outline during handling. Confirm the material and submission format before preparing a large or flexible template.
First establish what you are tracing:
| Your reference | What the template represents |
|---|---|
| Complete flat panel | The panel’s full perimeter, including edges normally hidden by seals or retainers. |
| Visible or structural opening | An opening reference. Label it accordingly; it is not automatically the required panel outline. |
| Flat blank that bends when installed | The unbent outline only. Installed curvature, mounting conditions and material suitability remain separate information. |
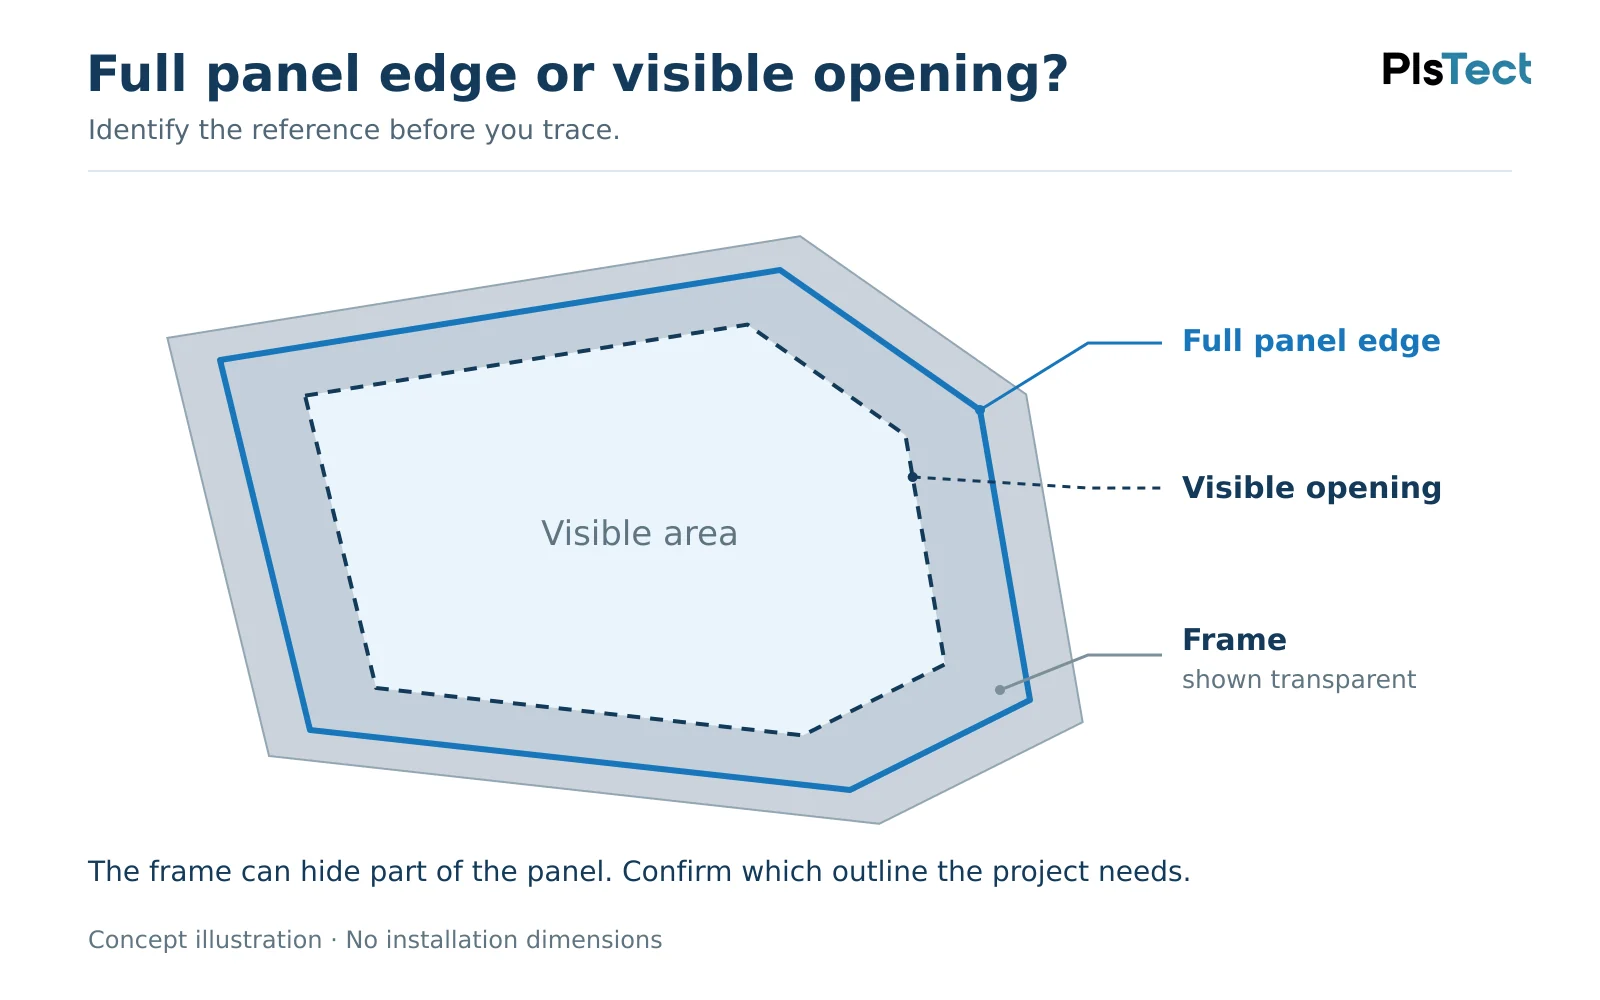
A formed or compound-curved window needs more than a flat outline. Do not flatten a curved original or force cardboard against it and assume the resulting shape is sufficient.
For a window that is curved or bends during installation, use our flat and curved window measurement guide to identify the additional geometry and mounting information to provide.
Prepare the reference and materials
Use clean, dry, uncreased cardboard large enough for the whole outline, a fine marker or sharp pencil, a straightedge, measuring tools and a firm, flat work surface. Avoid a previously folded box. For a large pattern, agree on a more stable material before joining smaller pieces.
Work from a reference that is safely accessible. Installed, heavy or damaged glass should be handled by qualified personnel; this guide does not require you to remove it yourself. If the only accessible reference is the opening, send photographs first and identify what remains hidden.
Prepare the template step by step
1. Identify the part and the edge being copied
Assign a panel ID and record the equipment model and window position. State whether the reference is the full original panel perimeter, an opening or an unbent blank. Also identify whether the requested item is a replacement panel or a complete framed-window assembly; the outline needed for one may differ from the reference needed for the other.
Record the original panel’s measured thickness separately, together with the units and measurement location. Use an appropriate instrument where the edge is safely accessible, and mark unavailable measurements as unconfirmed. Cardboard thickness does not represent glazing thickness, and the original thickness does not automatically determine the replacement thickness.
2. Trace one clear perimeter
Keep the reference and cardboard stable while tracing. Draw one narrow, clearly identified perimeter and keep the marker upright against the reference edge. Check corners and changes in direction before moving the original panel. Clearly cross out any earlier lines.
Preserve corners, notches and irregular details. If an area is chipped, missing or hidden, identify that area separately. Do not connect it with a guessed curve and present it as measured geometry.
Copy the reference as measured. Record proposed changes separately instead of adding or subtracting a uniform clearance around the whole template. The required allowance depends on the material and installation.
If the template is for a glass-to-PC replacement, also review thickness, mounting and surface requirements when replacing glass with polycarbonate.
3. Mark holes, slots and cutouts
Identify every hole, slot and cutout that belongs to the agreed reference. For each feature that can be measured reliably, record the following:
- Round holes: use crosshairs, assign hole IDs and record the measured diameter. Bolt diameter alone does not establish hole diameter.
- Locations: provide centre-to-centre distances and positions relative to clearly identified reference edges or datum lines.
- Slots: record width, overall length, orientation and end shape, distinguishing overall length from end-centre spacing.
- Other features: identify notches, rebates or countersinks and provide separate dimensions or close-up photographs.
Label uncertain features instead of inventing measurements. Markings document the existing reference; they do not automatically authorise identical holes or edge details in a different material.
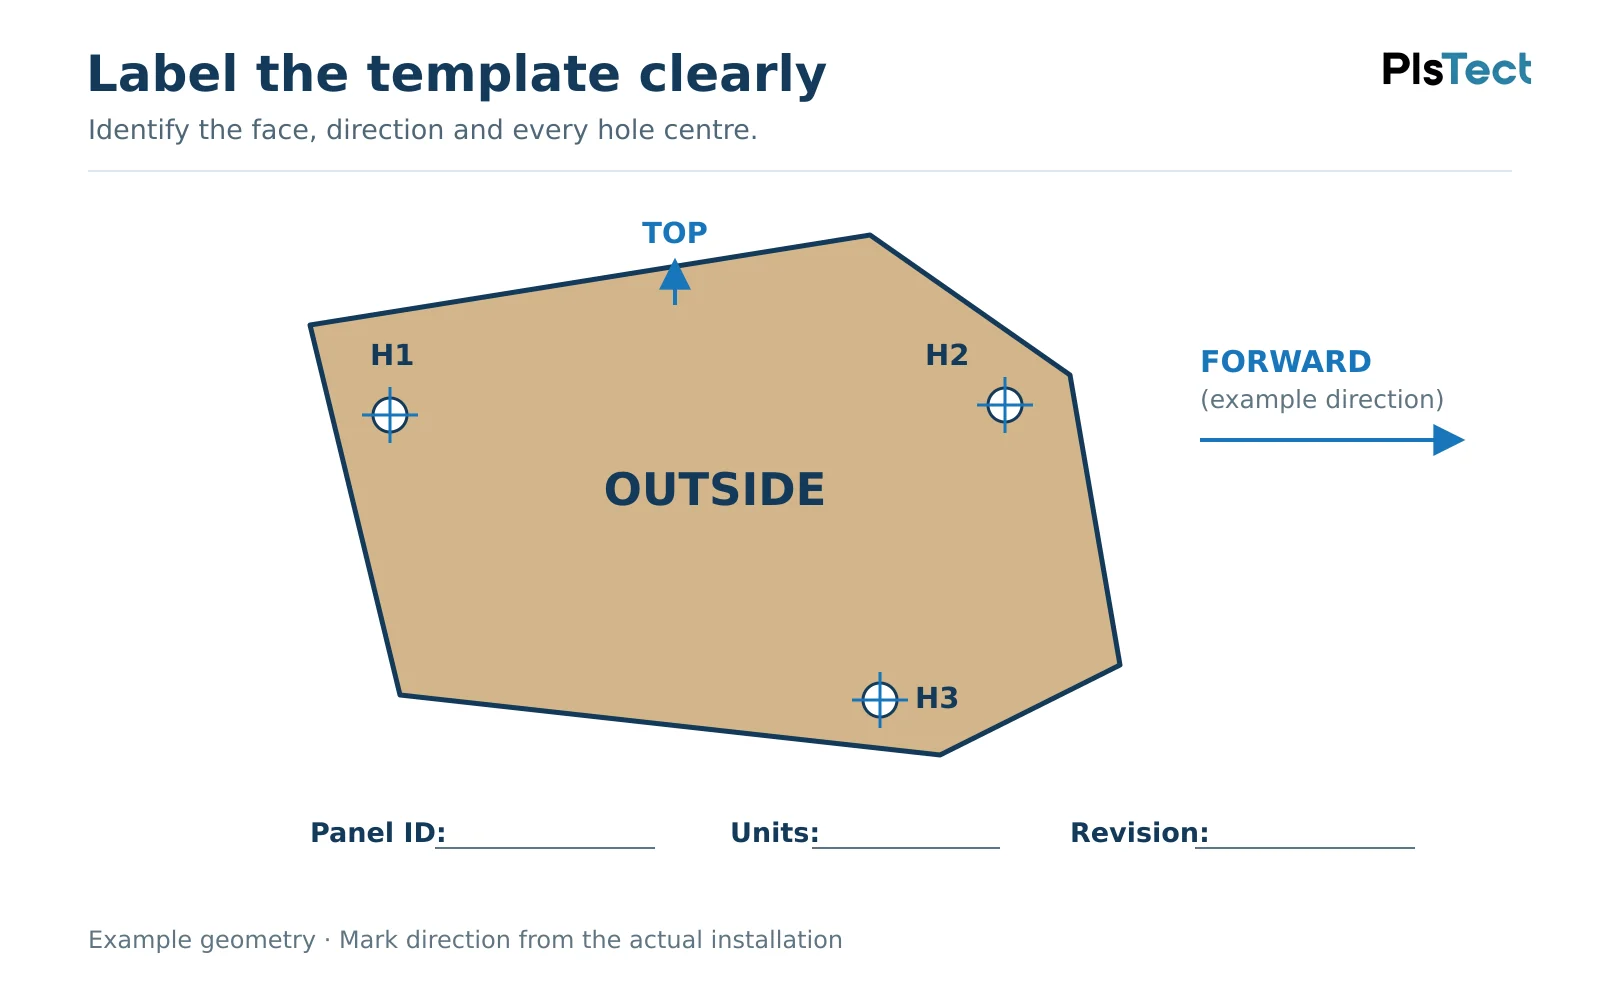
4. Make the orientation unambiguous
Label the face and direction while the reference is still in a known orientation. Use the following labels consistently so the pattern cannot be mistaken for the opposite side or a mirrored part:
| Label | What to write |
|---|---|
| Part identity | Panel ID, equipment model and window position. |
| Direction | TOP arrow; for side panels, identify the forward end. |
| Face | OUTSIDE or INSIDE on the corresponding template face. |
| Left/right basis | For example, “left side, viewed from the operator’s seat facing forward”. |
| Trace basis | Full panel perimeter, visible opening, structural opening or unbent blank. |
| Revision | Date, revision, your contact details and measurement units. |
Do not assume the opposite window is an exact mirror image. Confirm each side and label separate patterns whenever geometry or mounting differs.
5. Check key dimensions against the reference
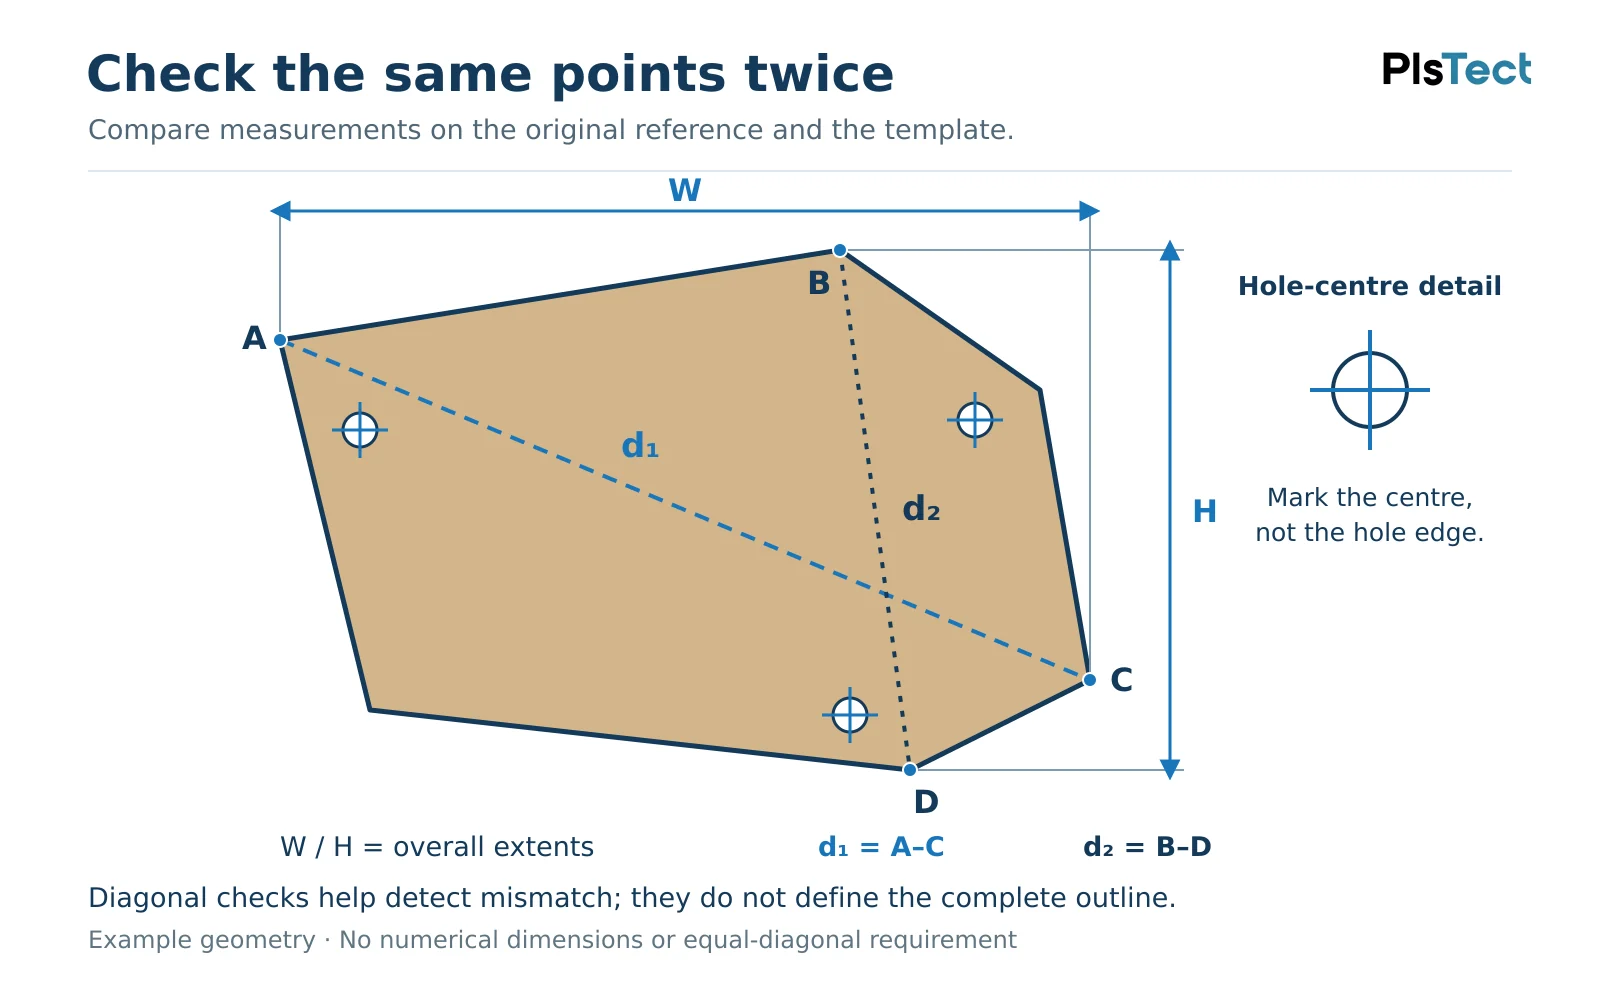
Measure selected dimensions directly on the reference, then check the same endpoints on the template. Record the values and units on a separate dimension sheet as well as on the pattern so a change during handling can be identified.
Record overall width and height, key hole spacings and useful cross-dimensions. If using the labels shown below, W means overall width and H means overall height. Mark identifiable points A–D, then record A–C as d1 and B–D as d2, using the same points on the reference and template. For an irregular outline, choose identifiable checkpoints rather than imaginary corners.
State every measurement’s endpoints and units. These checks can reveal mismatch or skew, but width, height and two diagonals do not completely define an arbitrary outline. The perimeter and local features still need checking.
If the traced shape and written dimensions disagree, resolve the discrepancy and issue a clean revision. Do not leave the manufacturer to decide which conflicting reference was intended.
6. Confirm whether to send a tracing or a cut-out pattern
Before trimming, confirm whether the project requires an uncut tracing or a cut-out pattern. Agree whether the marked line or the finished template edge will control the outline. Do not trim the template until that choice is clear.
If a cut-out is requested, trim carefully to the agreed perimeter and compare it with the original reference again. Remake a pattern whose edge is torn or overcut; do not conceal the error with an ambiguous patch.
Before sending a template to PlsTect
Start with photographs and project details for an initial discussion. Before dispatching anything, confirm whether a physical template is needed, its agreed format and the delivery arrangements.
Photographs to share first
Start with photographs of what you already have. You do not need to make a template for the first discussion.
- Existing panel or opening: show the whole reference and identify its position on the equipment.
- Frame and mounting details: show seals, retainers, holes and edge support where safely accessible.
- Damage or unknown areas: include close-ups and identify anything missing, hidden or uncertain.
- Available measurements: share approximate overall dimensions and any known thickness, with units. A close-up can help explain where a measurement was taken.
If a template is already prepared, add a photograph of its complete outline, panel ID and orientation labels, plus readable close-ups of dimension notes, hole IDs, slots and uncertain areas.
Include the equipment model, window position, requested quantity and any proposed material or installation change. Photographs help explain the reference and identify missing information; they do not replace the full-size outline or measurements needed to define the part.
Before you send the template
- The panel ID, equipment model and window position are recorded.
- The reference is identified as a full panel edge, an opening or an unbent blank.
- TOP, INSIDE/OUTSIDE and the left/right viewing basis are clear.
- Dimensions, units and measurement endpoints are readable; unknown areas are labelled and conflicting measurements are resolved.
- Photographs and a separate copy of the written dimensions have been retained.
- The physical-template format and delivery arrangements have been confirmed.
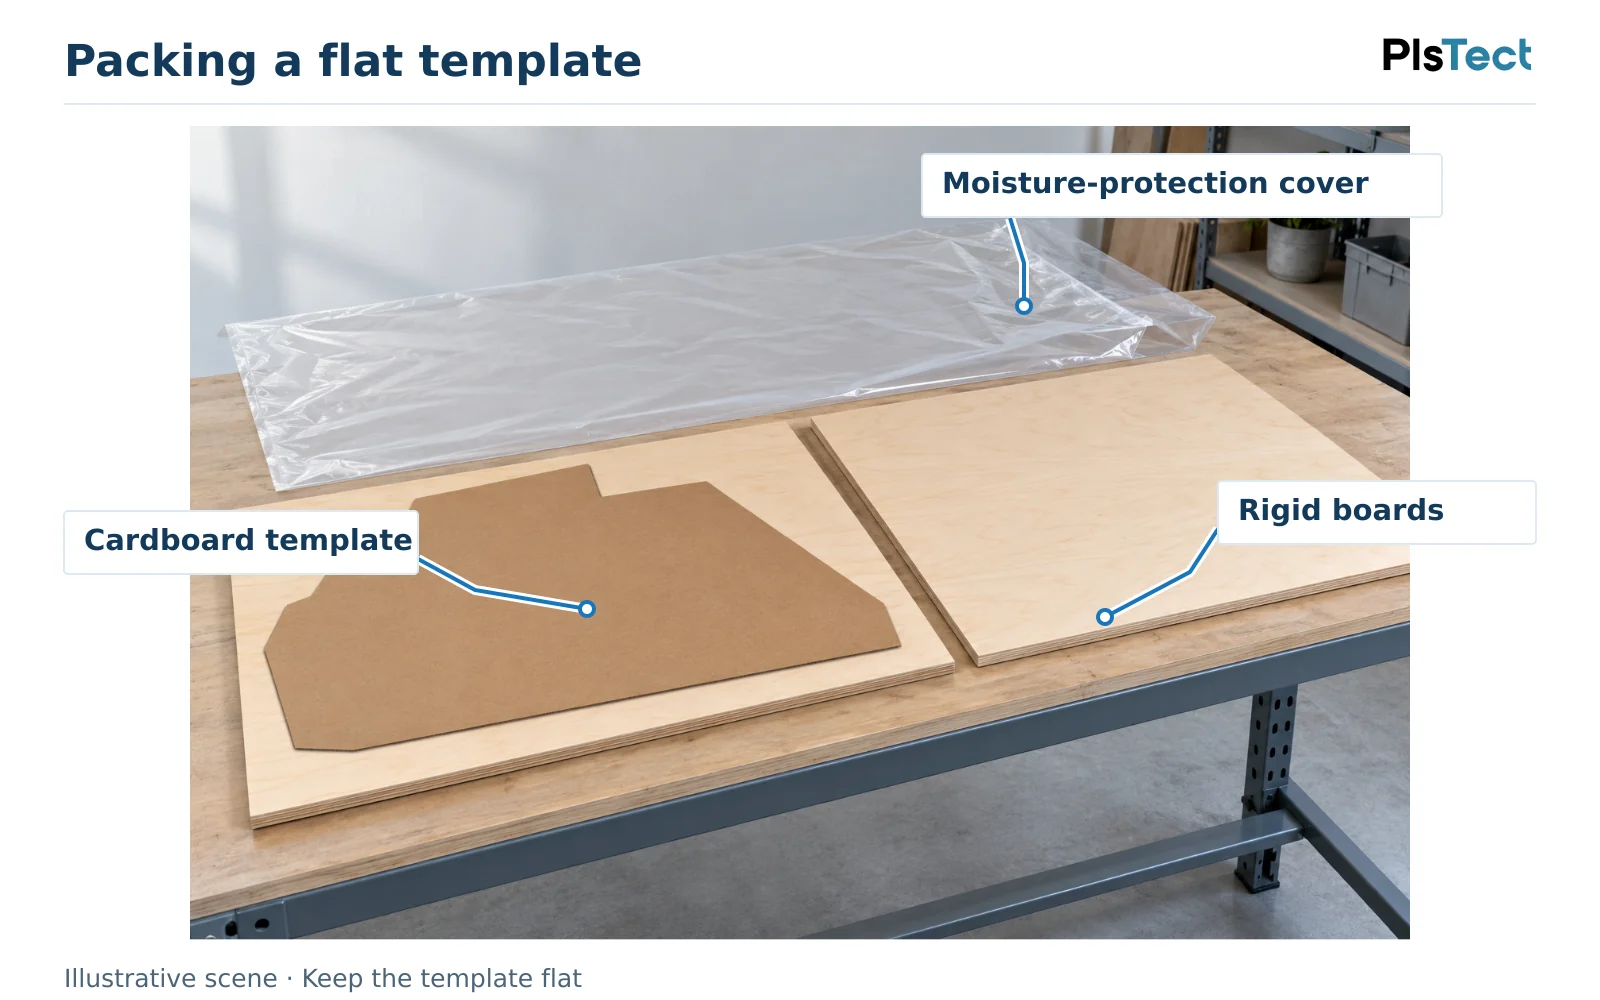
Keep the cardboard flat and protect it between rigid sheets, with a moisture-resistant outer cover and protection for the edges. Do not fold it to fit a smaller parcel. Include the panel IDs, revision, requested quantity and accompanying specification.
A template is one input to the project review. Material, mounting and order information must accompany it, and the manufacturing definition and acceptance requirements still need agreement.
Use the five-part quotation checklist in the project preparation guide to organise the remaining information.
Frequently asked questions
What if the original panel is missing?
You can document an accessible opening, but identify it as an opening reference. The full panel edge, overlap, seal engagement and clearances may still be unknown. Agree on the next measurements before treating it as a production pattern.
How accurate does the cardboard template need to be?
Agree on the required dimensional accuracy with the supplier for the specific part. Do not assume a universal cardboard tolerance. If the shape is too large, flexible or detailed to preserve reliably, use a more stable reference or suitable drawing and measurement route.
Does a reviewed template establish production readiness?
Not by itself. The geometry, material, installation and acceptance requirements still need agreement. Reviewing a template does not establish any required finished-product approval. Keep those requirements attached to the same project.
Related PlsTect support: Engineering Support · Industrial Equipment Windows & Transparent Panels
Further Reading
These supplier guides provide examples of template preparation for their own products and services:
- Wynne Performance Windows — Window Template Instructions. An example of rough-opening templates for framed windows, including orientation and window-location markings.
- Displays UK — Replacement Boat Windows. Examples of using original panels or physical templates, with discussion recommended before sending uncertain references.
For a PlsTect project, confirm the required reference, template format and delivery arrangements for the specific part.
Discuss your replacement window project
Share photographs of the panel or opening, the key dimensions you have and the quantity required. Include the equipment model and window position, and mark unknown details. Ask whether a physical template is needed and what format would be useful before preparing or sending one.